How Often Should I Water My Lawn?

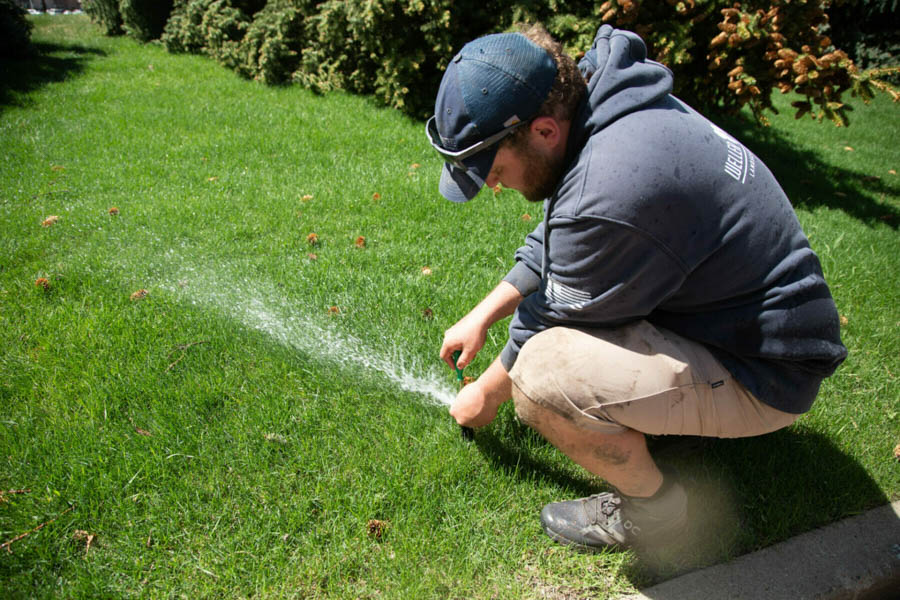
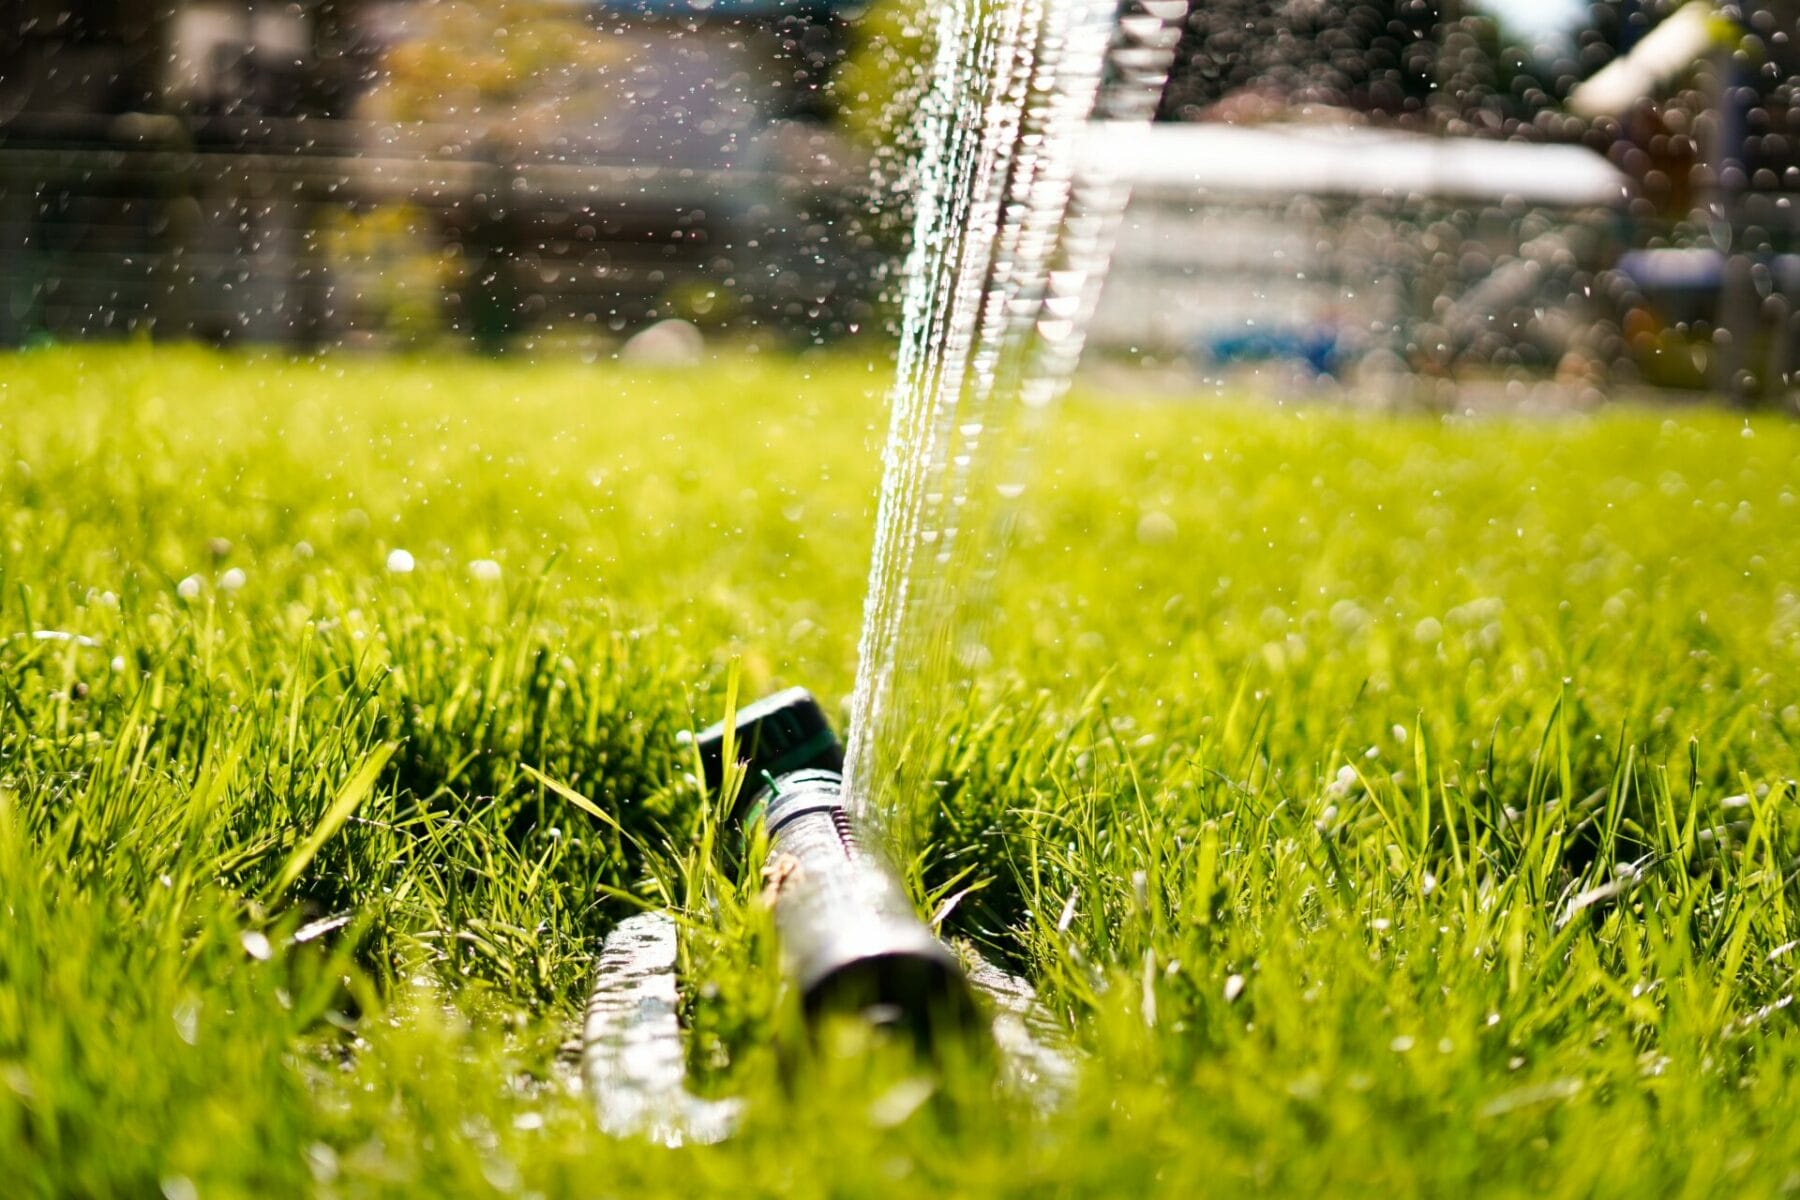
sprinkler in a green lawn

How Often Should I Water My Lawn?

Whether you have a lawn irrigation system or a garden hose and sprinklers, regular irrigation is key to keeping your grass living and thriving. 

If your turf becomes too dry, it will die; it’s that simple.

So, how often should you water? We’re glad you asked.

The general rule of thumb is to add supplemental water to your turf for a  total of one inch per week for a lush, beautiful lawn. This should be a combination of rainfall and/or irrigation.

Watering Your Lawn With a Sprinkler

The first time you use your sprinkler, set out a dish in the lawn to measure how much you’ve watered and set a timer to know how long it takes to reach one inch. These days, you can purchase a programmable hose end or faucet water timer, so you can then set it accordingly for the future.

There are many types of sprinklers on the market; select one that best suits your application needs. Most homeowners prefer an oscillating one.

Regardless of the type of sprinkler you select and, depending on the size of your yard, you may need several sprinklers or need to move the sprinkler in order to evenly water each section of the lawn.

Watering Your Lawn With an Irrigation System

At the beginning of the watering season (spring in the Midwest), check the heads and pipes for any breakage from the winter.

  • Begin by turning on the system and letting the sprinklers run for two or three minutes per station, checking that all sprinklers are releasing water with strong pressure and are rotating correctly. If any sprinkles don’t appear to be working, there may be a wiring issue, leak, or break in the line.
  • If anything appears to be broken, get a replacement part from a big box store or hardware store, making sure that you buy the correct part for the brand of irrigation system you have. While you can find these parts in stores or online, pay attention to the brand, model, and riser height. There are numerous variations within the make and models which can make it overwhelming. This is one benefit of using a landscape company, like Weller Brothers, to maintain your irrigation system.
  • Once you’ve confirmed that your irrigation system is working properly, adjust how long it needs to run depending on whether it’s a wet or dry season. If you don’t know how long to program it for, you can do roughly 15 minutes on a spray nozzle and 30 minutes on a rotor.

In Sioux Falls, watering days are based on odd/even days of the last number of your house number. The last digit of your house number determines if you are on an odd/even watering schedule. Per city regulation, don’t water between noon and 5 p.m. — the hottest part of the day.

Check Your Rotors’ Rain Curtain

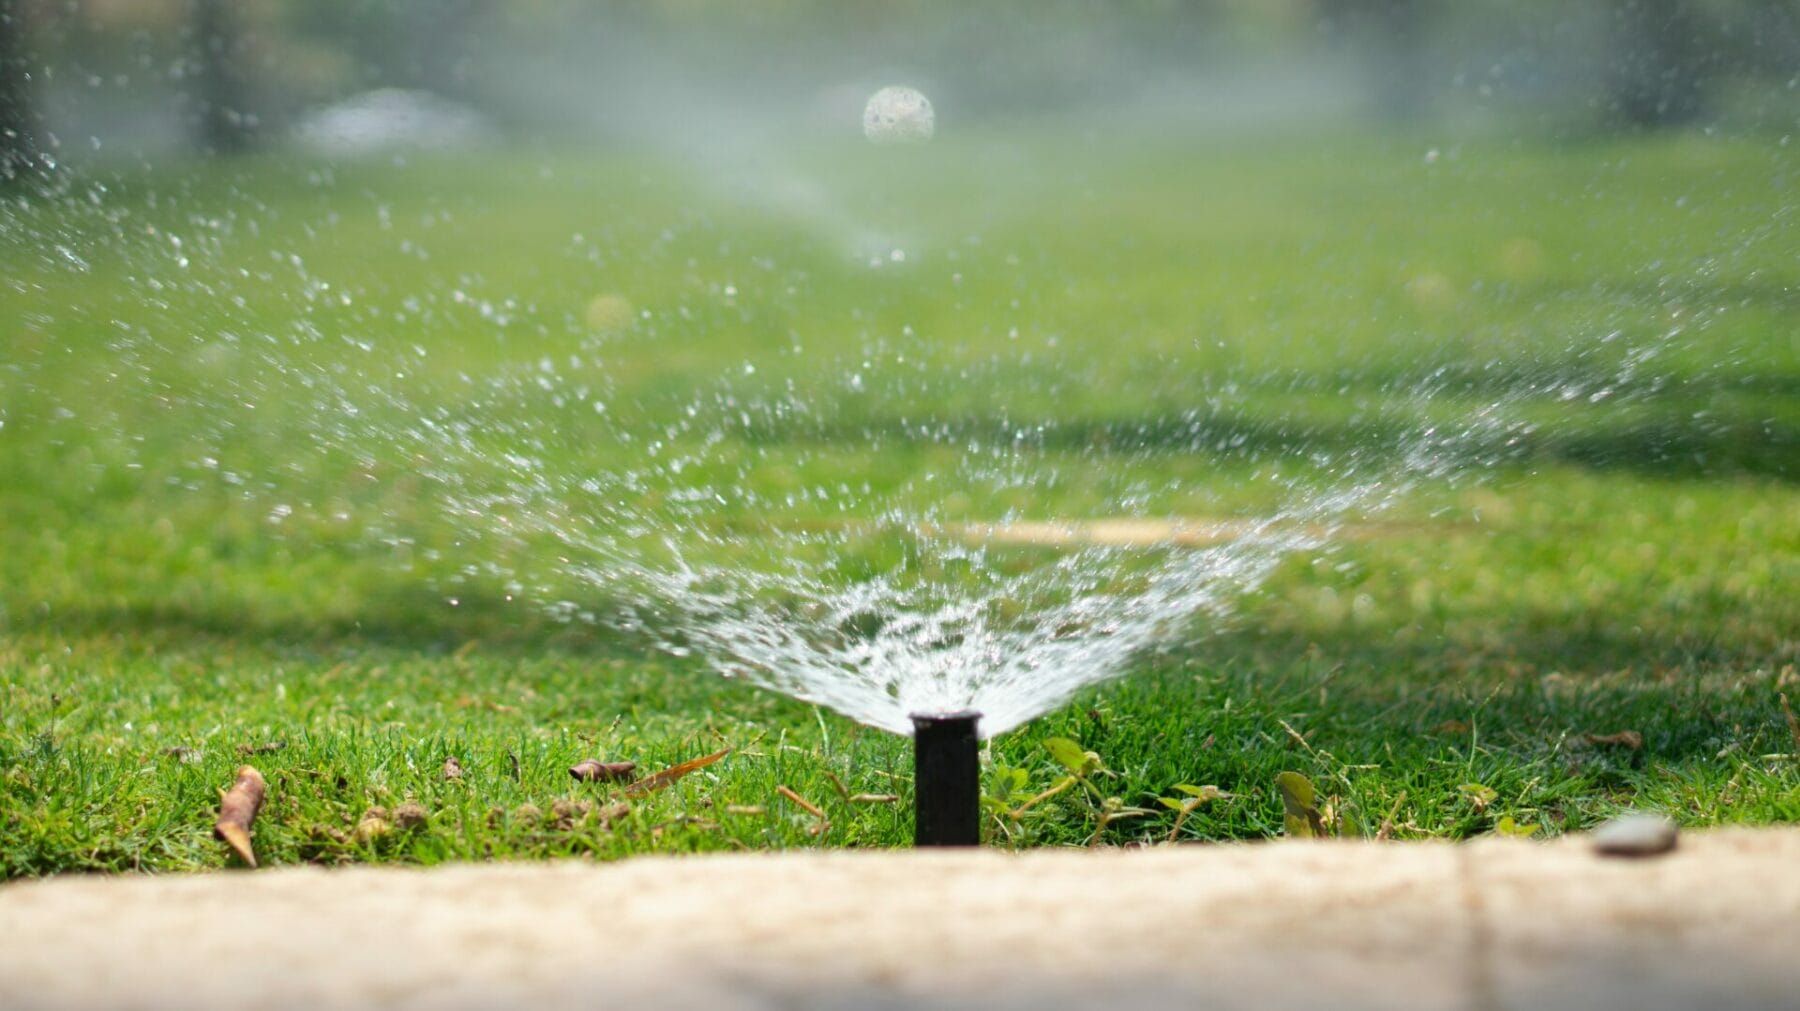
Before launching your irrigation system for the season, you should check the rain curtain on your rotors. A rain curtain refers to the uniform, rotating curtain of water emitted from the rotor head. 

If there is no rain curtain, use an adjustment tool appropriate for the brand of your system and manually adjust the rotor body until you achieve a rain curtain from the rotor head. If you have a huge lawn, this could take hours, but once they are adjusted, they should remain so for the future.

The largest culprit of ill-adjusted rotors will be the heads along the driveway and sidewalks, which may have been hit by snow removal equipment during the previous months.

Other Common Issues

With all of the tiny moving pieces to an irrigation system, there are several other potential issues that should be checked at the beginning of the watering season.

This includes checking the sprays, which are the types of irrigation heads that are commonly placed near sidewalks and driveways, as opposed to the rotors which are on the open lawn.

If sprays are not emitting water, the nozzle or the screen may be plugged. You can remove the obstruction from the nozzle with a paper clip. As for the screen, you can raise it or just replace it.

Also, wiper seals can become worn out on both spray and rotor heads. If the system is running and water is gushing out around the bottom of the cap or out around the riser, the seal likely needs to be replaced. Be sure to match the make and models of the head for the cap replacement — they are not universal. 

How Much Is Too Much Water?

With all of the tiny moving pieces to an irrigation system, there are several other potential issues that should be checked at the beginning of the watering season.

This includes checking the sprays, which are the types of irrigation heads that are commonly placed near sidewalks and driveways, as opposed to the rotors which are on the open lawn.

If sprays are not emitting water, the nozzle or the screen may be plugged. You can remove the obstruction from the nozzle with a paper clip. As for the screen, you can raise it or just replace it.

Also, wiper seals can become worn out on both spray and rotor heads. If the system is running and water is gushing out around the bottom of the cap or out around the riser, the seal likely needs to be replaced. Be sure to match the make and models of the head for the cap replacement — they are not universal. 

Too Much Work?

Many people are simply too busy to keep up with their lawn care. Consequently, their turf never lives up to its full, beautiful potential.

That’s why we are here! Weller Brothers Landscaping provides irrigation service, startup, and blowout services for residential and commercial properties in Sioux Falls, SD, and Rochester, MN.

Prepare Your Trees For Winter – Seriously; Please. We Beg You.

Arborvitaes with snow damage

Prepare your Trees For Winter

Seriously; please. We beg you.

It’s coming – the bitter winter cold.

You know it and you (probably) hate it. But, do you know who else hates suffering in the miserable cold?

Your trees, plants, and shrubs.

That’s right – as you drive off each morning in your remote-started car with seat warmers, with your dog wearing warm booties in the passenger’s seat, your plants and trees are watching you with contempt.

As we approach the cold embrace of winter in the Midwest, protecting your trees becomes more critical than ever. Let’s delve into the essential steps you can take to ensure your trees, shrubs, and plants thrive through the harsh winters.

Why Winter Tree Protection Matters

Jokes about contemptuous trees aside, cold weather protection is a necessity for your plants’ well-being. The South Dakota, Minnesota, and Iowa winters can be brutal, with extreme temperatures and heavy snowfall. Without proper protection, your trees can face a range of problems:

  1. Bark Damage: The cold, hungry animals can strip the bark of young trees, leaving them vulnerable to diseases and structural problems.

  2. Root Stress: Without late winter hydration, the tree’s roots may become stressed, leading to dehydration and root damage.

  3. Winter Burn: The brutal winter winds can cause desiccation, essentially drying out your trees and leading to dieback.

Remember, the consequences of winter neglect can be dire, potentially costing you the loss of your trees and shrubs.

How to Protect Your Trees and Plants in the Winter

There are a few helpful ways to protect your trees, shrubs, and plants from the issues noted above. Please heed these suggestions from our expert lawn and tree team!

1. Use Tree Guards

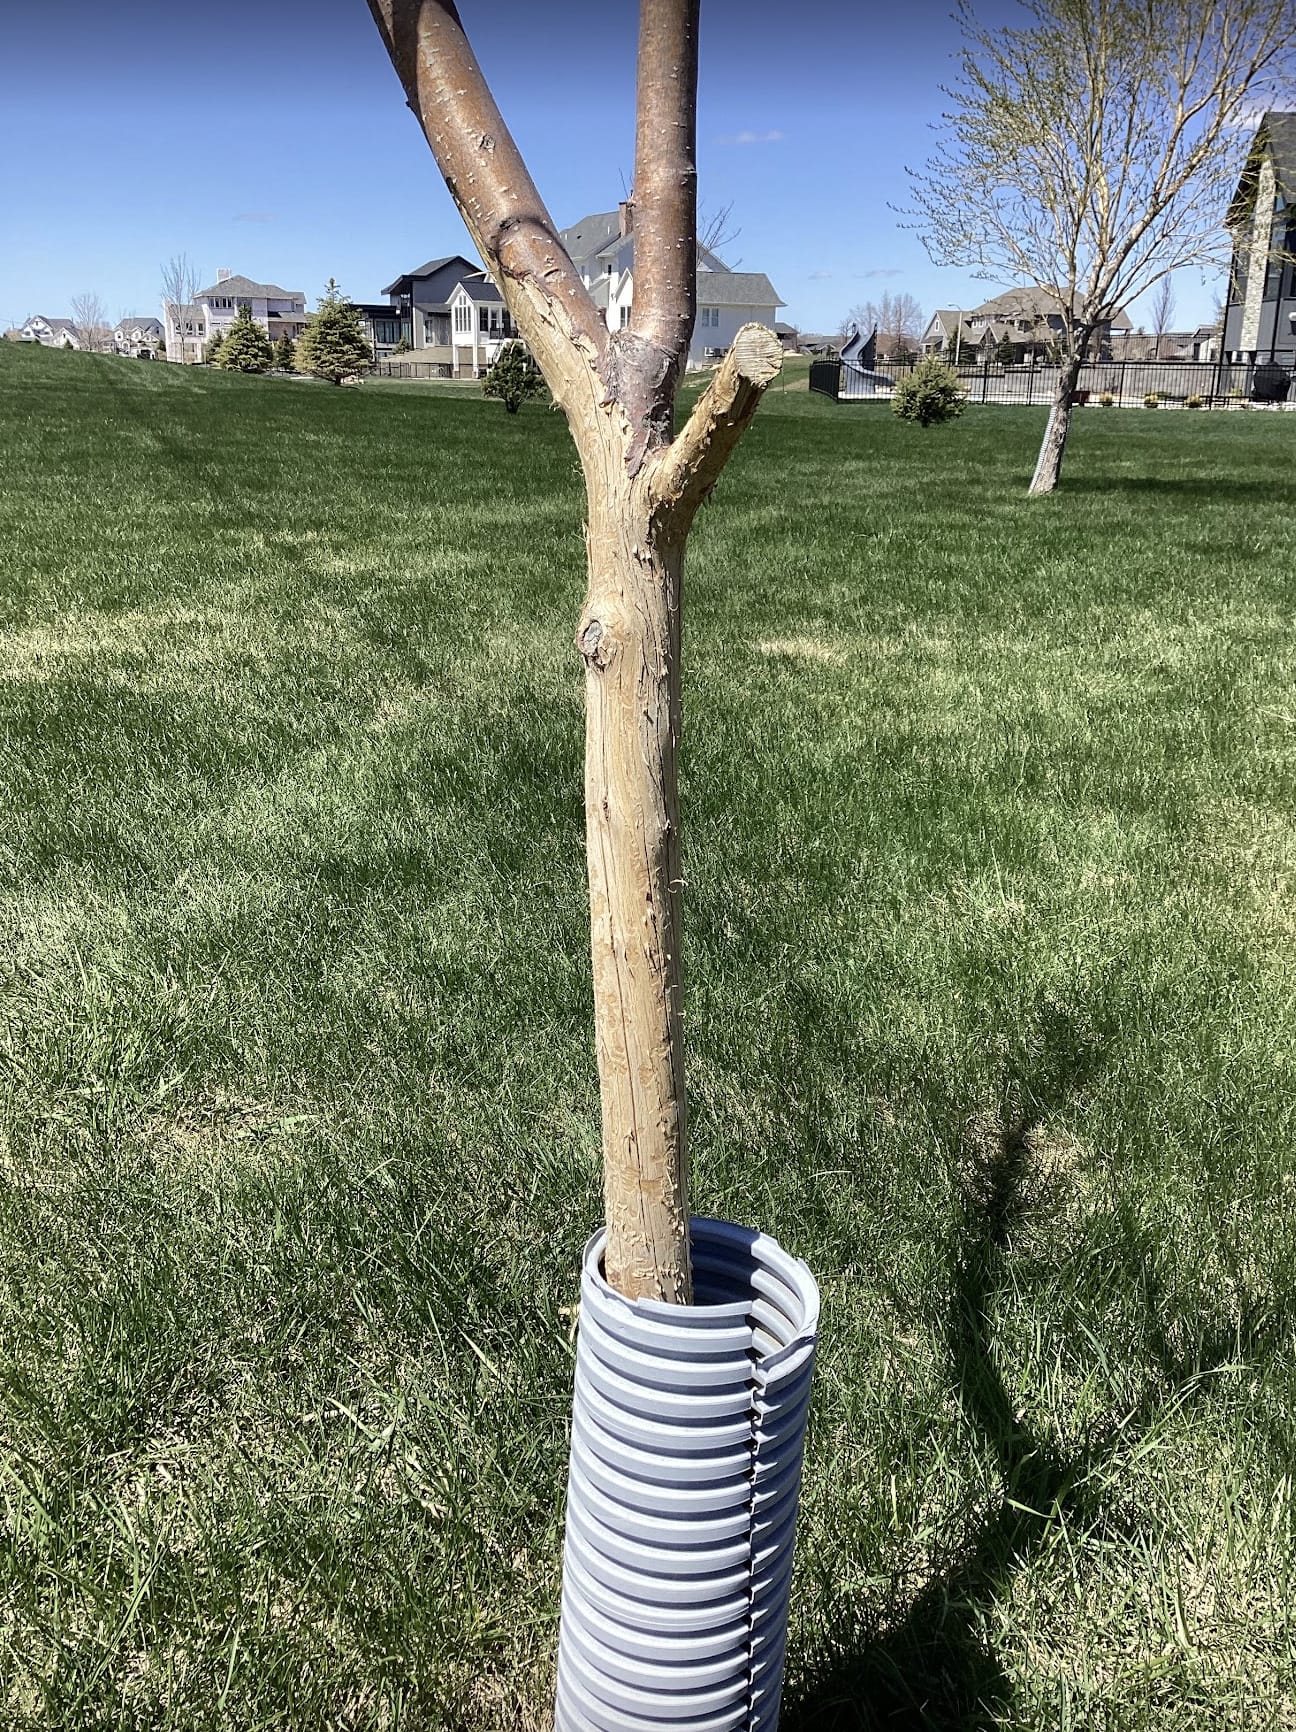
Tree guards are simple structures that wrap around the base of the tree, safeguarding against nibbling wildlife and unexpected temperature fluctuations.

It’s common to see hungry rabbits or deer gnaw on a tree bark in the winter. This is because the season has limited their usual food supply so they’re extra hungry. Having a tree guard in place will encourage the critters to go elsewhere.

Secondly, tree guards can create a microclimate that provides some warmth and stability to your tree’s roots and trunk.

You can purchase tree guards from your local hardware store. Otherwise, call upon our team to do the work of placing the guards on your trees.

apple tree with guard and rabbit damage

This apple tree is damaged from a rabbit nibbling on it over the winter.

You can see the owners tried to protect the tree with guard, but the snow drifts got so high that the critters ate above the tree guard.

To avoid this, be sure to apply tree guard as far up the tree as possible.

2. Perform Late Fall Watering

Before the soil freezes, we recommend watering through the late fall and into the early winter to give your trees a deep drink before the weather becomes too cold and dry:

  • Water the tree thoroughly, ensuring the soil is well-hydrated but not waterlogged. Our recommendation is to water at least every other week for 10 minutes with a hose on a slow trickle for deciduous trees, evergreen trees, and large evergreen shrubs such as Arborvitae and Junipers.
  • Perform the early-winter watering when the soil is above 40 degrees F and there is no snow covering.

This helps your trees and shrubs against the dry winter drought and minimizes damage to the root system. Just like humans, well-hydrated trees are healthier, stronger, and look better!

3. Cage or Burlap Your Arborvitaes, Boxwoods, and Junipers

These evergreens are the most susceptible to damage from drying winter winds and snow accumulation.

To prevent this, wrap burlap or wire cages around Arborvitaes, Boxwoods, and Junipers in the late fall to shield them from harsh winds and heavy snow. 

This provides a “blanket” of sorts to the plants, which prevents windburn, breakage from snow, and animal damage, specifically from rabbits, squirrels, and deer.

If you choose not to do this, you’ll likely be replacing your damaged trees and shrubs next spring. Take our advice seriously here – your trees and your wallet will thank you!

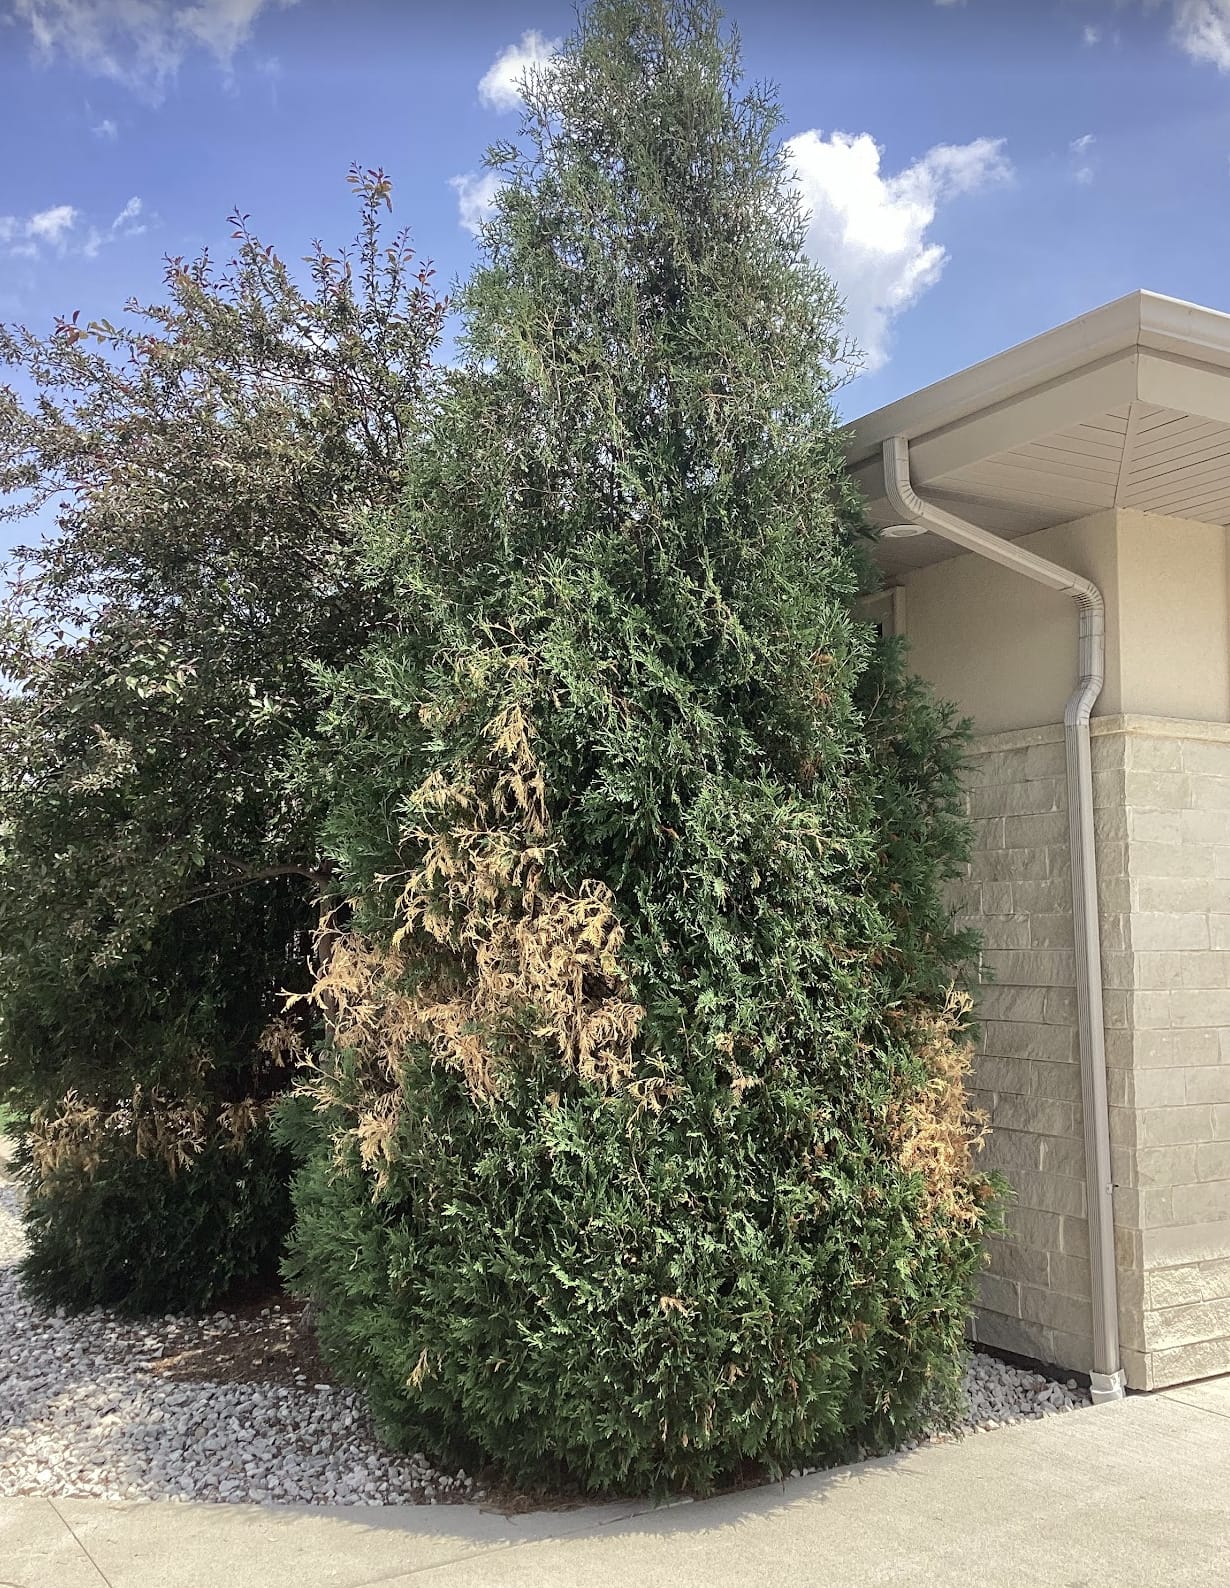
arborvitae with snow damage

Because they are along the driveway, snow was packed and plowed up against these Arborvitaes.

We recommend piling the snow in a different location, but also putting a snow fence or cage around them. 

Unfortunately, Arborvitaes are very sensitive to snow damage, and this one will need to be replaced.

4. Apply an Anti-Desiccant Spray, like Wilt Pruf

Anti-desiccant acts as a protective coating of the leaf or needle of evergreens, which reduces water loss during high periods of stress like cold, dry weather.

When the ground is frozen, the tree cannot replace the moisture that is lost from the leaves, which will lead to severe damage or death.

An anti-desiccant, such as Wilt Pruf, will help retain the moisture in the leaves or needles for up to four months in the winter. You can purchase Wilt Pruf at your local hardware or garden store, or you can request that our team apply it for you.

Pro tip: You can also use it to protect holiday wreathes and trees from moisture loss!

5. Touch Up Your Mulching

In the Midwest, applying mulch around trees during winter is crucial for several reasons.

It helps insulate the soil, maintaining a more stable root temperature, which is vital to protect against freezing and thawing cycles. This insulation also conserves moisture, prevents soil erosion, and suppresses weed growth, ensuring the tree’s health and resilience through the harsh winter months.

Take some time to add extra mulch protection to your trees before it gets too cold! What an easy way to aid in tree damage prevention.

Let’s Take Care of Your Trees Before Winter Arrives!

Each spring, we hear from customers who are disappointed that their trees, shrubs, and plants didn’t make it through the winter. It’s always discouraging to hear this because we want your plants to thrive; they are living organisms that should be well cared for.

So, as always, we implore you to take these winter tree protections seriously. 

If you are uncertain of what to do or simply don’t have the time, contact us to do it for you. Let’s work together to get your trees through the winter healthy and happy!

Ideas to Consider For Your Dream Outdoor Kitchen

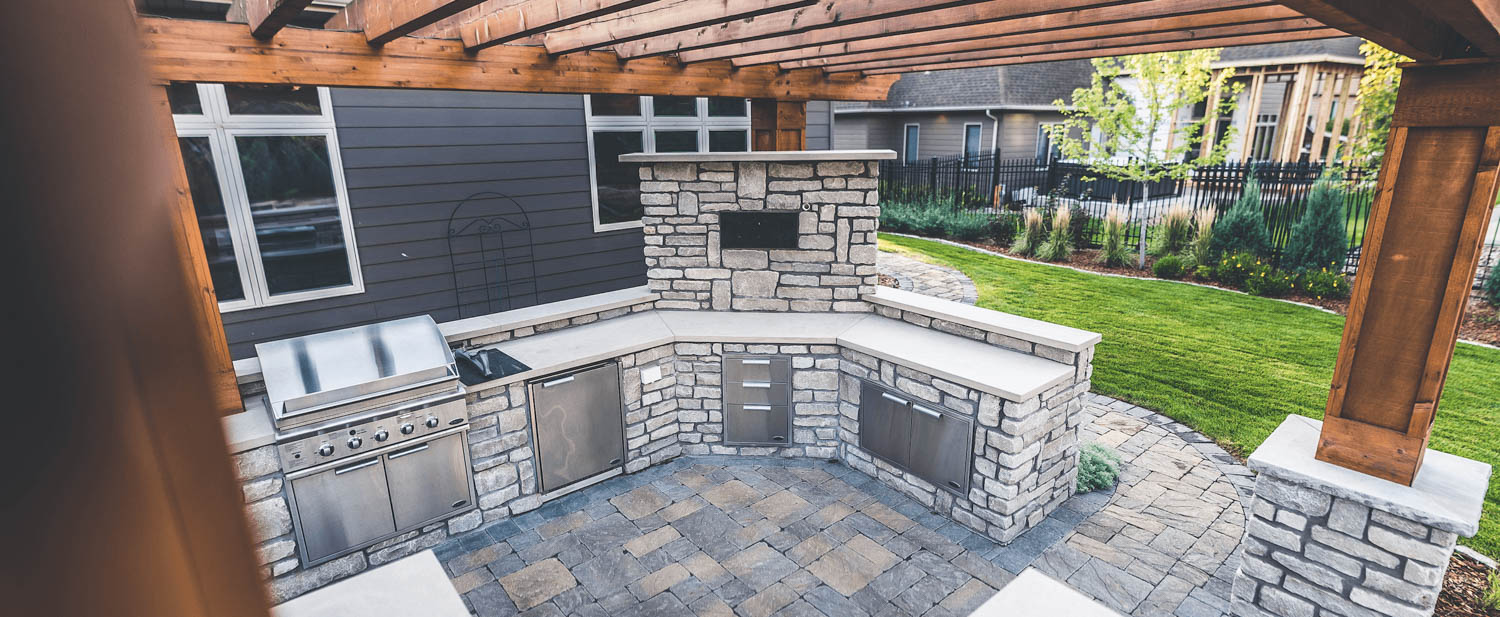
Full Outdoor Kitchen with Mantel Style look, Weller Brothers Landscaping

Ideas to Consider For Your Dream Outdoor Kitchen

Our customers in Rochester, Des Moines, and Sioux Falls reach out to us with the goal of extending their indoor living space into the outdoors. For many, this means including an outdoor kitchen in their landscape design.

You may quickly brush off the idea of an outdoor kitchen as a lofty investment that will bring your landscape design beyond your budget. However, our designers can likely incorporate the outdoor kitchen elements that you’re looking for into nearly any budget.

So, whether you envision a full-service outdoor kitchen with custom masonry details or a simple kegerator and flat-top stove area – or something else – we’re here to help you decide what will be best for your lifestyle and your budget.

Read on to learn about our favorite outdoor kitchen elements for Midwest homes!

Customizable – The Options Are Endless!

brats being cooked on a grill

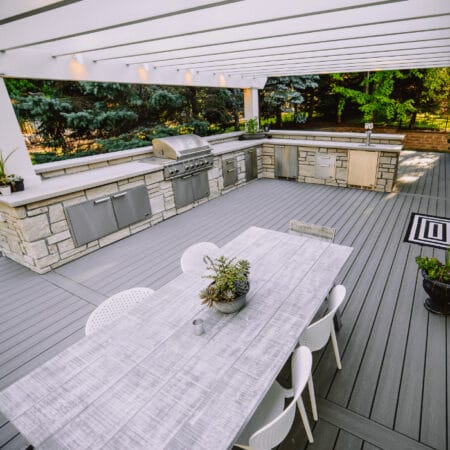
The outdoor kitchen is one of the most customizable features in your landscape design.

Unlike some landscaping features that have limitations, outdoor kitchens offer many possibilities. You can tailor your outdoor kitchen to your exact preferences and modify it to your space. Here are a few customizable aspects to consider:

  1. Material Selection: Outdoor kitchens can be constructed from a variety of materials, including veneer stone on a wooden frame, cinderblock retaining walls, and fascia block walls. Your choice of material can greatly impact the aesthetics and functionality of your kitchen.

  2. Size and Shape: Depending on the space available, you can decide on the size and shape of your outdoor kitchen. This flexibility allows you to create a kitchen that perfectly fits your backyard.

  3. Accessories and Appliances: From grills to refrigerators, there’s a wide array of appliances and accessories to choose from. You can even integrate unique features like a kegerator, flat-top griddle, or a pizza oven.

Outdoor Kitchen Elements To Consider

While the options for customization are virtually limitless, here are the elements we typically see our customers choose for their outdoor kitchens:

  1. Grill: A must-have for any outdoor cooking enthusiast, a high-quality grill is the centerpiece of your outdoor kitchen.
  2. Counter space: Adequate counter space is essential for food preparation, serving, and entertainment.

  3. Fridge: An outdoor refrigerator eliminates the need for trips back and forth to the indoor kitchen.

  4. Bar top or Countertop seating: Whether it’s a bar top or counter with seating, having an area for guests to sit and chat while you cook is a great addition.

Once you cover the basics, you can have even more fun with your outdoor kitchen! Here are additional ideas you may not have thought of:

  1. Smoker: If you already own a smoker, it can be seamlessly integrated into your outdoor kitchen, adding a new dimension to your culinary adventures.

  2. Kegerator: For beer enthusiasts, a kegerator allows you to serve fresh, draft beer right from your backyard.

  3. Flat-Top Griddle: A flat-top griddle is a fun and sleek alternative that allows you to expand your culinary adventures beyond grilling.

  4. Pizza Oven: A custom ceramic masonry pizza oven or a smaller one adds a touch of authenticity to your outdoor kitchen. We’ve had customers implement huge, custom-masonry pizza ovens or smaller, more budget-friendly options.

  5. Fire Table: Consider a fire table as part of your island to create a cozy, warm ambiance.

  6. Swim-Up Bar: While it can be complicated, a swim-up bar is a unique and luxurious option for those with ample space and budget.

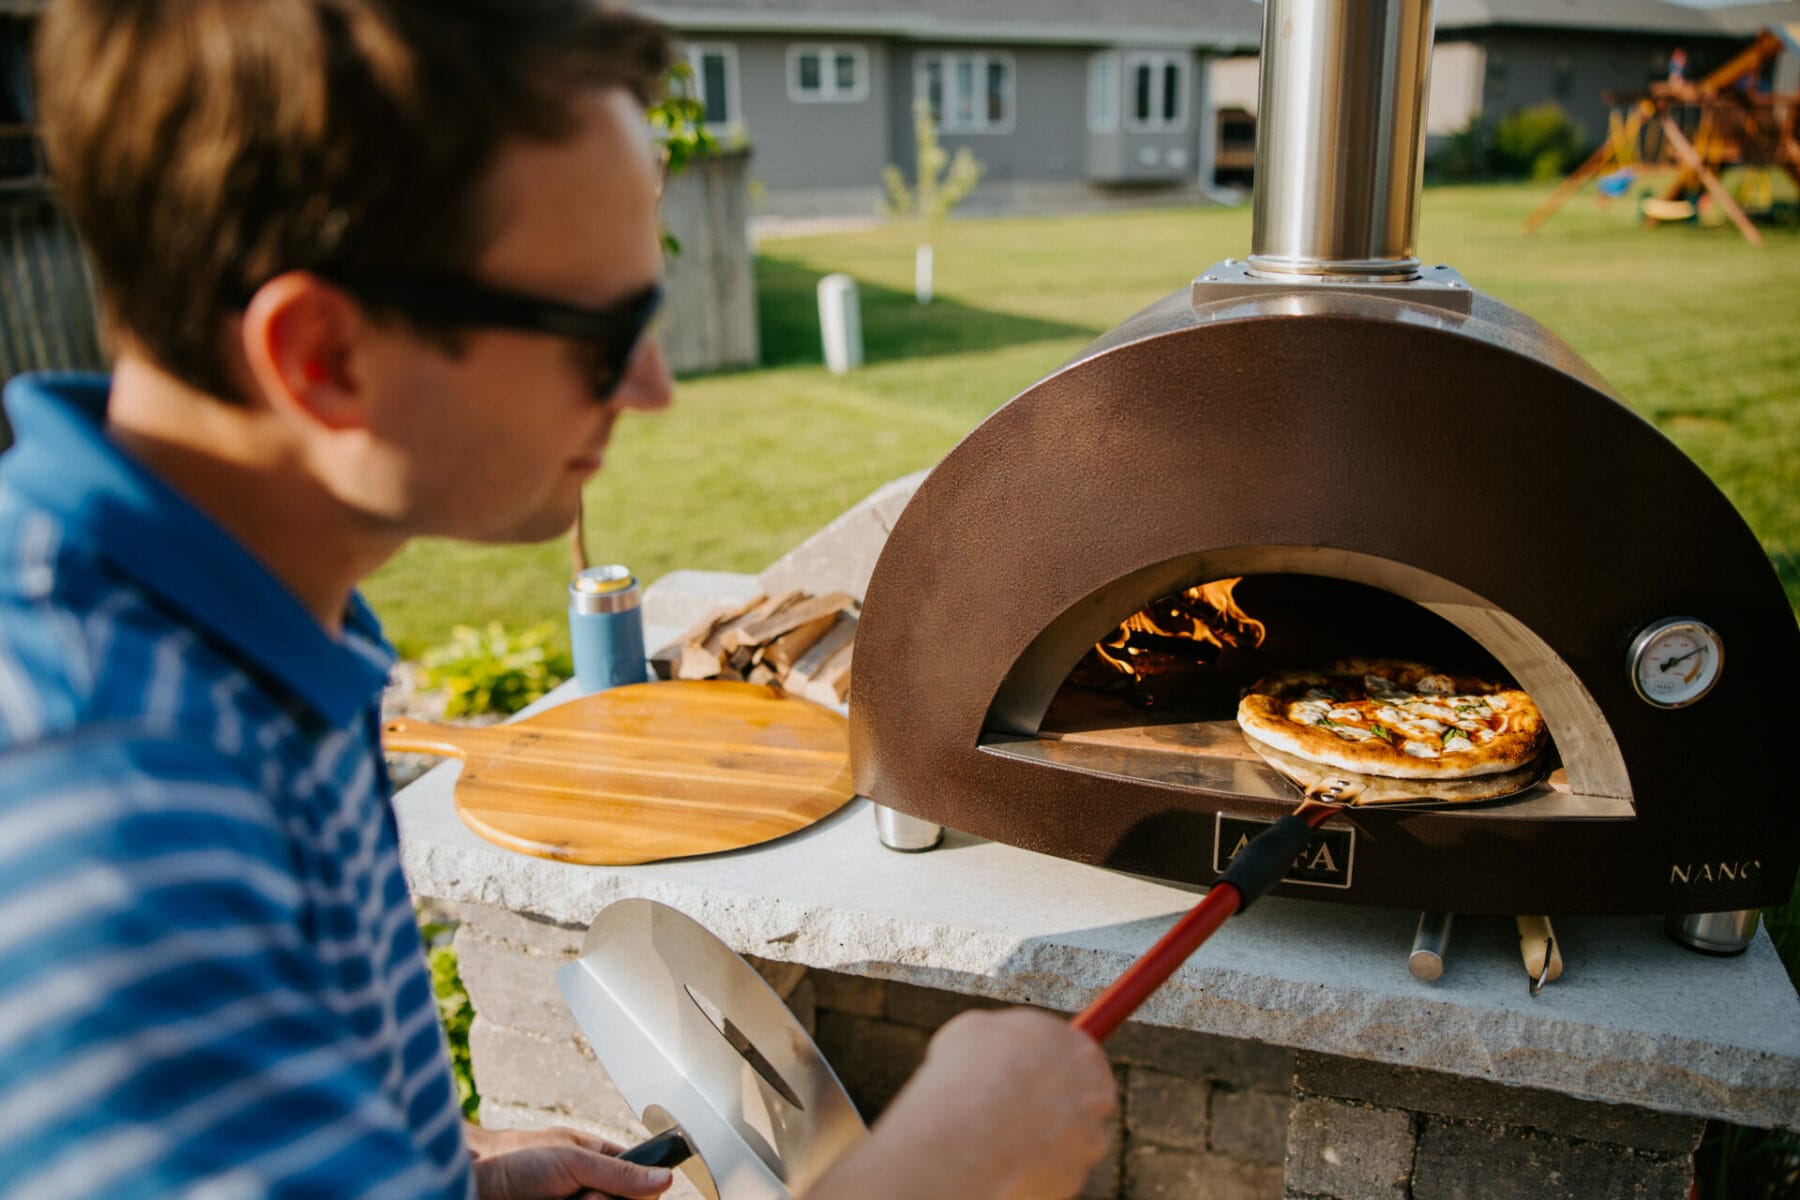
man removes pizza from his outdoor pizza oven
homeowners cooking tacos on their evo flat top grille

Designing an Outdoor Kitchen On A Budget

Creating an outdoor kitchen can be a significant investment, but it’s possible to design one that fits within your budget. Here are some tips for stretching your dollar.

For example, instead of building an all-custom outdoor kitchen, our designers can order an outdoor kitchen kit from our suppliers. These pre-designed kits have modular components and they can be a more budget-friendly option.

An important note regarding kits is that the cost savings come from the time saved on the design and planning of an entirely custom kitchen. The elements and appliances are still the same high-quality materials that you can always expect when working with Weller Brothers.

Our landscape designers will always work with you to identify the best options that align with your budget and your vision. That said, let’s discuss what the outdoor kitchen design process looks like!

Other Elements to Consider For Your Outdoor Kitchen

Lastly, you may not have thought about these small but important considerations for your outdoor kitchen. Here are some additional questions are designers will bring up:

  1. Gas or Propane: Decide whether you want a gas line or propane for your grill and other appliances.

  2. Sink Location: Determine if you want a sink connected to your irrigation system or back into your house.

  3. Outlets: Consider how many outlets you want on your backsplash for crock pots or counter lights.

  4. Customization: Think about personal touches like custom beer taps for your favorite sports team or other unique customizations.

The Outdoor Kitchen Design Process

Choosing the elements for your outdoor kitchen involves collaboration with your landscape designer. Our team knows all of the ins and outs of creating and outdoor kitchen!

Here’s how the process typically works:

  1. Initial Consultation: Your designer will listen to your needs, preferences, and budget. They’ll draw up a design based on this information.

  2. Product Selection: The designer will make product decisions based on your budget range. They may present you with options for different elements, ensuring you’re happy with the design.

  3. Customization: If you have specific appliances or fixtures in mind, the designer can work around those, ensuring your outdoor kitchen perfectly suits your desires.

You can gain a more in-depth understanding of our landscape design process in Sioux Falls, Rochester, and Des Moines right here.

Weller Brothers employees discussing a design at a table

Let’s Get Cooking!

Do you feel inspired? We hope so!

Your next step toward having an outdoor kitchen is to schedule a consultation with one of our designers in Rochester, Des Moines, or Sioux Falls.

We’ll check out your space and discuss your budget and what elements you’d love to include in your updated space. We can’t wait to brainstorm with you!

Outdoor Holiday Decor and Planters: Tips From the Professionals

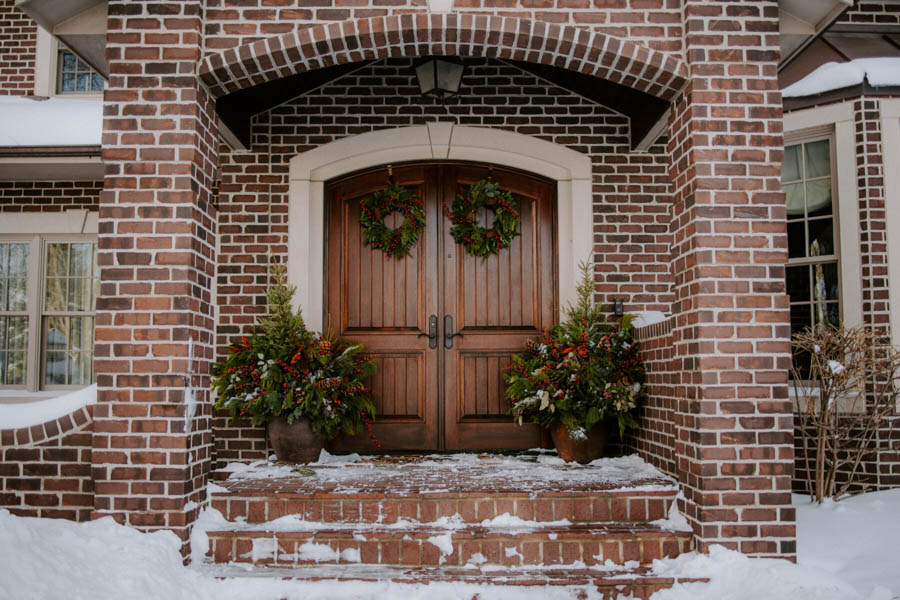
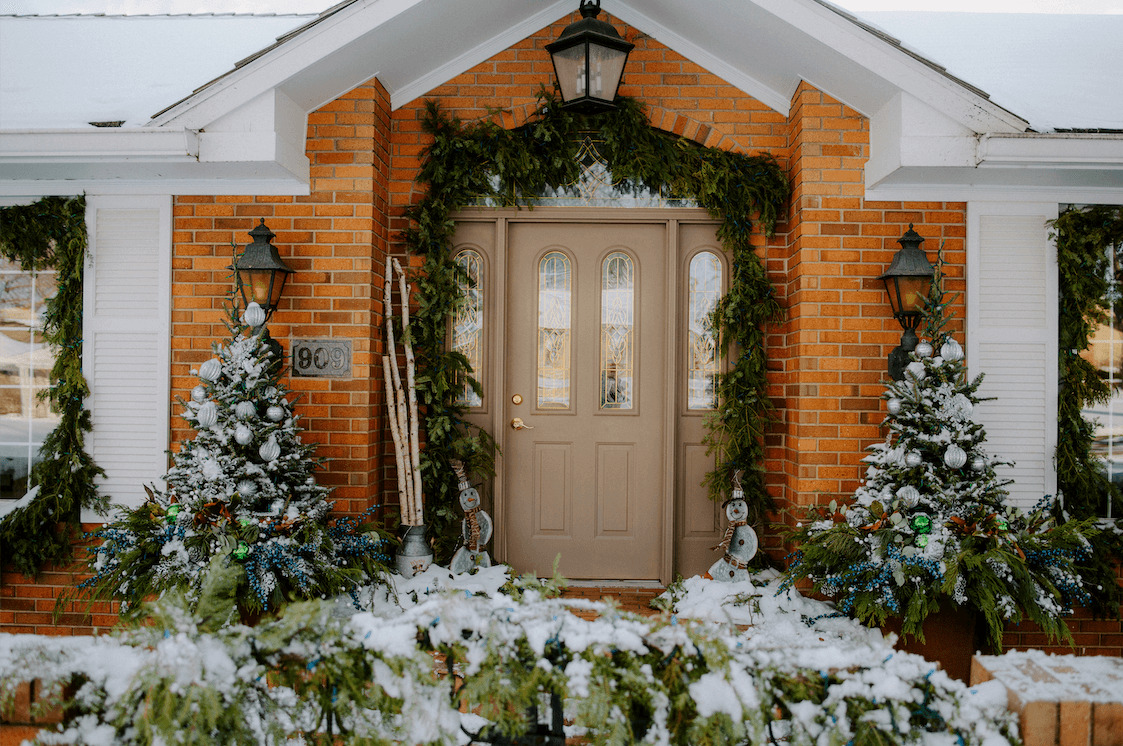
front door of a brick home with holiday planters and wreaths

Outdoor Holiday Decor and Planters: Tips From the Professionals

Transform Your Home into a Winter Wonderland

The holiday season is right around the corner, and it’s time to start thinking about how to make your home truly shine during this festive time of year.
 
At Weller Brothers Landscaping, our horticulture team creates elegant and upscale holiday decor. From hanging lights on homes and trees to crafting large custom wreaths and planters, we have the expertise to make your home look beautiful and festive without you having to lift a finger.
 
Our team shares some professional tips for holiday decor and planters that will help you achieve a festive and upscale holiday facade in Sioux Falls, Rochester, or Des Moines.

Tip #1: Plan Ahead

The key to a stunning holiday display is careful planning.

Begin by deciding on a theme or color scheme that complements your home’s architecture and surroundings.

Whether you prefer a traditional red and green palette or a more contemporary silver and gold theme, having a clear vision will make the decorating process smoother.

Tip 2: Invest in Quality Lights

When it comes to outdoor holiday lighting, quality matters.

We recommend investing in professional-grade LED lights. They are not only energy-efficient but also long-lasting, ensuring your display remains vibrant throughout the season.

For rooflines, we recommend C9 bulbs. They are high-quality, look nice, and the bulbs are spaced nicely. We prefer to purchase these from ChristmasLightsEtc., because of their phenomenal quality.

For trees and pots, we recommend single-molded sockets, which prevent moisture from getting into the wires. Any of the below styles are good, and just depends on the style you like:
You can also purchase these online, but several big box stores will have them as well, such as Ace Hardware.

Tip 3: Add Custom Wreaths and Planters

Nothing says “elegance” like a beautifully crafted wreath on your front door and stunning planters adorning your entryway.

If you don’t have an eye to design planters yourself, our horticulturists at Weller Brothers Landscaping can create custom wreaths and planters that match your chosen theme and reflect your unique style.

These eye-catching additions will instantly elevate your home’s curb appeal and make a lasting impression on your guests.

When designing your seasonal planter, consider the weather. A few tips:

  • In the Midwest, wind is common and can cause pots to tip over, and greens and decor can blow away. Make sure to securely fasten your decor.
  • Not all silks are rated for outdoor use. If you’re using silks, make sure they won’t bleed when wet.
  • Water your pots after you’ve designed them. It’ll freeze, which helps to hold the materials in place.

Tip 4: Embrace Natural Elements

Incorporating natural elements like evergreen branches, pinecones, and berries into your decor adds a touch of authenticity and warmth. These elements not only look beautiful but also bring the scents of the season to your doorstep.

You can mix and layer different elements and textures. To create a natural look, drape or cascade materials over the edge of your planters or steps. Nestle decor, like berries or pinecones, into the greens.

Have fun with it!

Tip 5: Focus on Symmetry and Balance

Achieving a polished and upscale look requires attention to detail. Symmetry and balance are key principles in holiday decor.

When arranging lights, wreaths, and planters, try to create a harmonious and visually pleasing composition that enhances the architectural features of your home.

Want to know our trick at Weller Brothers?

It’s “thrill, fill, spill.” By including one tall “thriller” item, filling a planter with another material, and having a third material spill over the edge, you will create an eye-catching piece of decor!

Lastly, consider if your decor will be viewed from one side or four sides and design accordingly. 

Contact Us for Your Holiday Decor in Sioux Falls, Rochester, and Des Moines

This holiday season, let us take the stress out of decorating your Midwest home.

Our experienced horticulture team will ensure your home stands out in your neighborhood. Contact us here to request seasonal decor services. This is the best part about winter in the Midwest!

Five Questions to Ask Before Hiring a Commercial Snow Removal Company

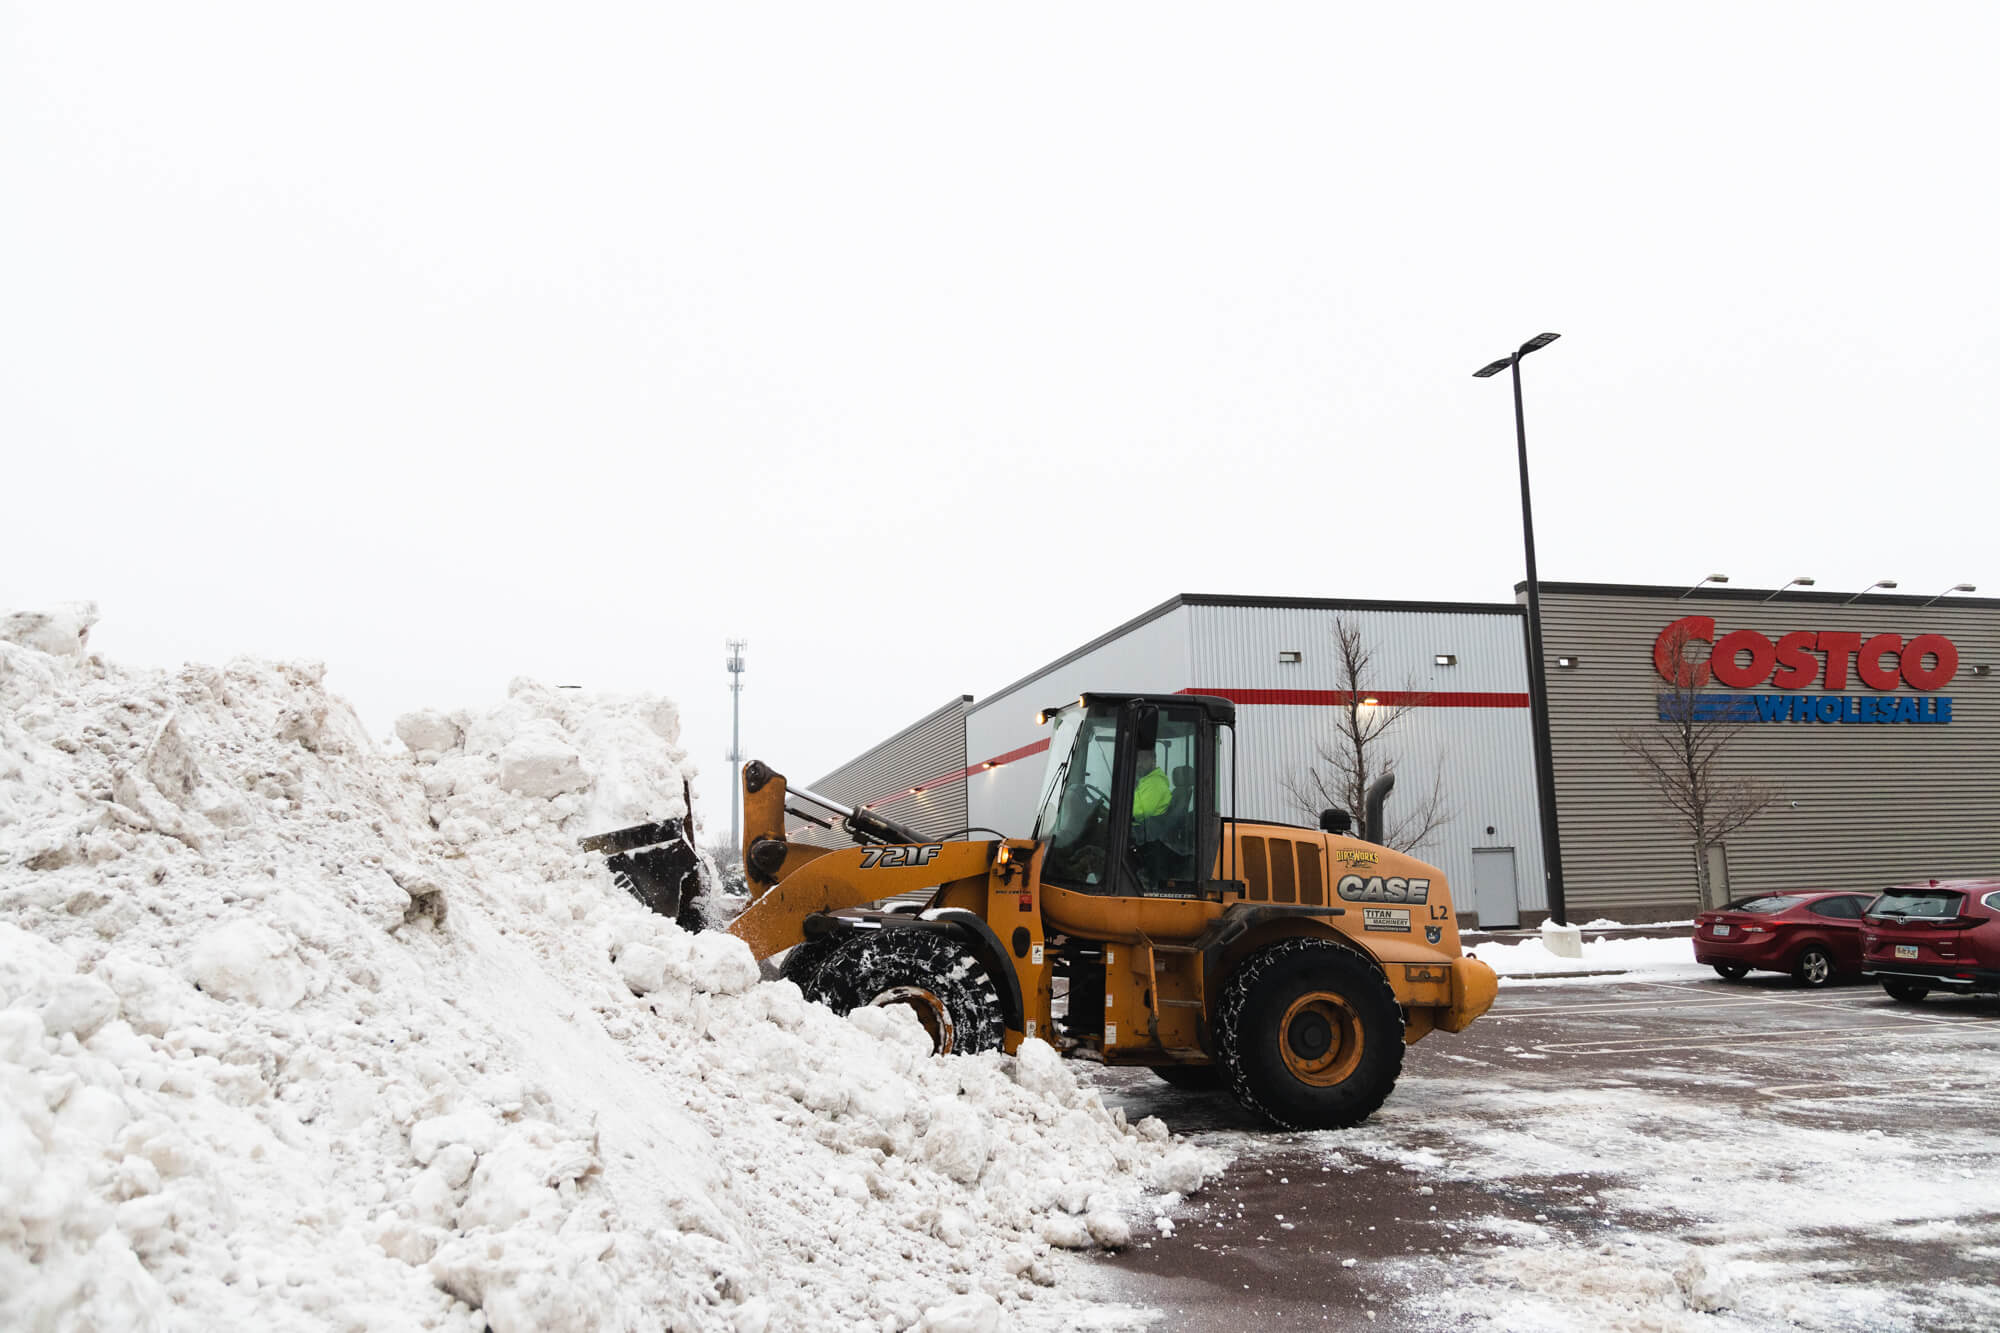
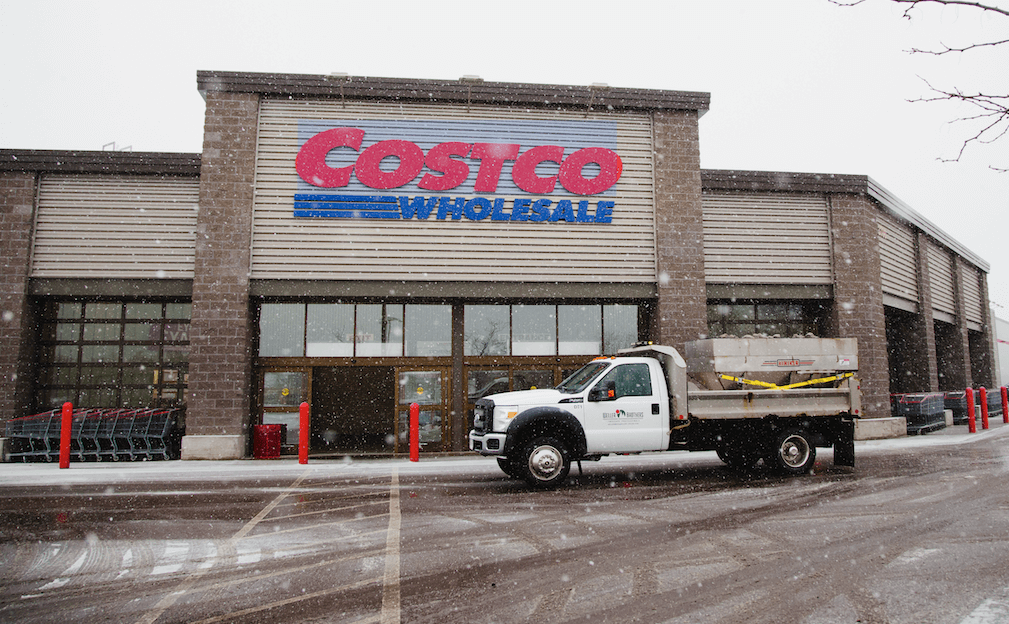
snow removal in large parking lot in sioux falls

Five Questions to Ask Before Hiring a Commercial Snow Removal Company

As the winter season approaches in Sioux Falls, SD, and Rochester, MN, business owners and property managers of expansive parking lots understand the importance of reliable snow removal services.
Snow and ice can pose significant challenges, affecting safety and accessibility for employees and customers.

When it comes to commercial snow removal for large properties, partnering with the right company is crucial.  Every business property is unique, and understanding the scope of the job will help you make an informed decision.

Let’s discuss five essential questions you should ask before hiring a snow removal company for your business.

1. What Equipment Do You Use?

One of the most critical aspects of commercial snow removal is the equipment used.

For large parking lots, you need a company with substantial machinery capable of efficiently clearing snow and ice.

Ask the prospective company about the types of equipment they have and whether they are well-maintained for optimal performance.

At Weller Brothers, our snow removal fleet includes:

  • skid loaders with articulating blades
  • payloaders
  • large push-boxes
  • trucks with v-plows
  • and, of course, the manpower to run it all!

In addition to having the necessary equipment for large snow removal properties, we also have a dedicated, on-site fleet mechanic, so our equipment is in good shape and fixed quickly when something goes wrong. That means no down-time for our customer.

2. Are You Experienced With Large Properties?

Experience matters when it comes to snow removal for large business properties.

Inquire about the company’s track record with similar-sized lots and their ability to handle large-scale snow removal efficiently. A seasoned company will have a better understanding of the unique challenges that come with larger areas.

For example, are the crews experienced and trained to handle large sites in an effective and time-efficient manner? Do they know how to clear snow quickly (before you open for business hours)? Will they keep your parking lot flow in mind as they pile large amounts of snow, in order to inconvenience customers as little as possible?

If you hire an experienced snow removal team, you may never even notice they were there (except for the snow being moved!)

3 What Is the Communication Protocol?

A well-thought-out snow removal plan is crucial for ensuring timely and effective service. Ask the company to outline its plan, including the frequency of visits, snow removal techniques, and their approach to ice management.

This will help you gauge their preparedness and reliability.

It’s important that you have these conversions before the first storm of the season so you are aware of the execution plan ahead of time and can communicate it with your team.

Should something come up during a storm, will you have one dedicated point of contact and a clear means of reaching them? Or, will you be stuck on hold with a busy office admin team? This during-storm communication protocol is just as important as the pre-storm communication.

At Weller Brothers, for example, you’ll have the contact information for your dedicated Account Manager, who you can call before, during, or after a storm.

4. Do You Provide 24/7 Emergency Services?

We all know that winter weather can be unpredictable in South Dakota and Minnesota. It’s essential to have a snow removal company that offers 24/7 emergency services to handle unexpected snowfall or ice accumulation outside of regular business hours.

Ensure that they can respond promptly to maintain safety and accessibility for your employees and customers.

At Weller Brothers, for example, we have a dedicated team of managers who watch the forecast closely in the days and hours leading up to potential snow. They communicate frequently with their crews via a group messaging app so that our snow removal employees are ready to respond and dispatch as soon as the snowfall begins in Rochester or Sioux Falls. These logistics take time and planning on our end, but our commercial snow-hauling customers appreciate the quick service.

5. What Are Your Pricing and Contract Terms?

Discuss commercial snow removal pricing and contract terms upfront to avoid surprises.

Ask about their billing structure, whether it’s based on per-visit or a seasonal contract. Clarify if there are any additional charges for emergency services or extra-deep snow removal.

Understanding the financial aspects will help your business budget effectively for winter snow removal.

Partner with Weller Brothers for Commercial Snow Removal

Selecting the right snow removal company for your business is a decision that directly impacts safety, accessibility, and peace of mind during the winter months. By asking these five essential questions and considering your specific needs, you can make an informed choice.
 
At Weller Brothers Landscaping, we specialize in providing top-notch snow removal services for businesses with large parking lots in Sioux Falls, SD, and Rochester, MN.
 
Our state-of-the-art equipment, experienced team, and comprehensive snow removal plans ensure your property remains safe and accessible throughout the winter.
 
Contact us today to discuss your commercial snow removal needs and get a customized solution that fits your requirements.

Weller Brothers Receives a National Award of Excellence

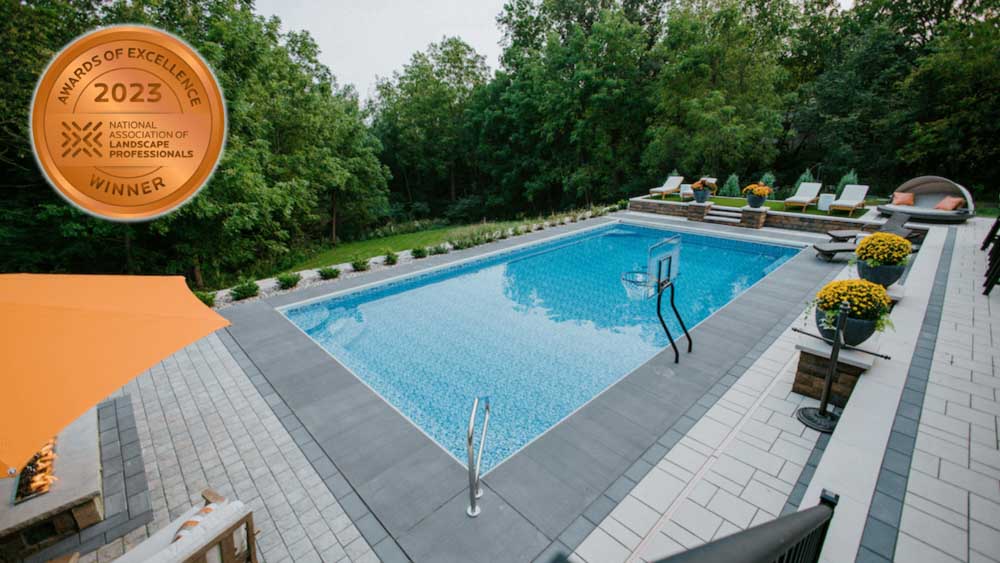
Award-Winning Pool and Patio in Rochester, MN

Weller Brothers Receives a National Award of Excellence

We are proud to announce we have been awarded an Award of Excellence – Bronze by the National Association of Landscape Professionals.

A Hillside Transformation

The awarded project in Rochester, MN, was designed by Matt Stadel.

For many years, this expansive backyard sported a large, outdated deck and unimpressive landscaping. The homeowners were ready for change, which included a pool and much more.

Given the slope of the yard and the area dedicated to the pool, the Weller Brothers team had a relatively small area to work within. Yet, the team cleverly fit all of the elements into this project that the homeowners were hoping for — a sunken hot tub, outdoor kitchen and pergola, fire pit, and lounging areas. 

See before and after photos, as well as a video tour of the project here.

“We met with Weller Brothers, and then three weeks later they came back with a plan. We were blown away. Every one of our items we wished for were on there; the design was incredible. After that initial discussion, we knew that this was the team we wanted to work with.”
loungers near a pool on a paver patio

About the NALP Excellence Awards

Each year, the National Association Landscape Professionals Awards of Excellence recognizes exceptional commercial and residential lawn care and landscape installation, maintenance, and design projects from around the nation.

This year, 194 awards were bestowed to companies for their outstanding work.

couple laughing by a fire pit

Take a Tour of the Winning Project in Rochester, MN

While you may not be able to jump into the pool or cook a meal on the Evo flat-top stove yourself, you can certainly take a virtual tour of this award-winning backyard in Rochester!

Then, once you’re feeling inspired, reach out to us to begin creating your outdoor living space in Rochester, Sioux Falls, or Des Moines. Who knows – maybe it will win our next award!

How to Properly Prune Your Trees

Shady backyard landscaping

How to Properly Prune Your Trees

Pruning your trees is an important part of maintaining the health and beauty of your Midwest landscape. Properly pruned trees can have stronger, more resilient branches and a more attractive overall shape. 

However, pruning can also be harmful if not done correctly, so it’s important to follow a few key steps to ensure that your trees are pruned properly.

licensed tree worker carrying a large branch

Why You Should Have Your Trees Pruned

First, it’s important to understand why you should prune your trees. Pruning helps to remove dead or damaged branches, which can prevent the spread of disease and insects. It can also help to shape the tree, directing its growth in a way that is more aesthetically pleasing.

Additionally, pruning can help to improve the tree’s overall health and vigor.

Failure to prune can also pose a safety risk. In the city of Sioux Falls, for example, homeowners often receive letters regarding Project T.RI.M. This is a proactive tree inspection program to address low-hanging tree branches over streets and sidewalks. It is the responsibility of the property owner to maintain safe walkways for pedestrians.

Doing It Yourself? Consider The Risks.

We certainly recommend that you hire a certified and licensed arborist to perform your tree pruning. However, if you decide to do it yourself, please only do so for lightweight branches that you can safely reach from the ground.

We all like to save a buck, but let’s be smart. Only certified arborists should prune branches that:

  • Require any climbing to reach
  • Are large or heavy
  • Hang near or over property like a rooftop or cars
  • Might be diseased or infected

Also, a professional is insured should any damages occur. A branch may fall on your roof, and wouldn’t it be better to have them foot that bill? Or, what if you injure yourself while attempting to prune your trees, ending up with an urgent care cost?

By choosing a professional like Weller Brothers, you can have peace of mind knowing we are insured and will also carry out a risk assessment before working on your trees.

Now, do you simply have lightweight branches hanging over your sidewalk that need to be cut back? Okay, you can probably handle that.

Let’s talk about how to do it properly.

How to Prune Your Trees

Before you begin pruning, it’s important to inspect the tree carefully. Look for any dead or damaged branches, as well as any branches that are crossing or rubbing against each other. These are the branches that should be removed first.

When pruning:

  • Use a pair of pruning shears, loppers, or a saw, depending on the size of the branch you’re cutting.
  • Make clean, sharp cuts.
  • Cut just above a bud or lateral branch to encourage new growth.
  • Avoid leaving stubs, as these can lead to disease and decay.

Key Considerations When Pruning

It’s also important to prune trees at the right time of year

In general, it’s best to prune trees while they are dormant, in the late winter or early spring. This allows the tree to focus its energy on healing and new growth once it wakes up from its winter dormancy. 

However, there are some exceptions to this rule. For example, if you need to remove a branch that is diseased or infested with insects, it’s better to do it as soon as possible to prevent the spread of the problem.

When pruning, it’s also important to consider the overall shape and structure of the tree. Don’t be too aggressive with your pruning, as this can damage the tree and interfere with its natural growth patterns. Instead, try to prune in a way that enhances the tree’s natural shape and form.

Need Tree Pruning in Sioux Falls?

sioux falls tree removal team wearing hard hats

Overall, pruning your trees can be a rewarding experience that helps to keep your landscape healthy and beautiful. By following these simple guidelines, you can help to ensure that your trees are properly pruned and well-maintained.

If you have more important things to do with your time than giving your trees the TLC they need, sit back and contact the professionals.

Our experienced tree and horticulture teams in Sioux Falls, SD are happy to perform your tree pruning – or even removal, if needed. We have licensed arborists and are ready to help.

Note – tree health and removal services are only available at our Sioux Falls, SD, location.

Five Steps to Prep Your Yard for Winter

Lawn care employees removing leaves from front porch

Five Steps to Prep Your Yard for Winter

The Midwest winter cold can be a huge shock to your yard, garden, and landscaping. It’s important to prep your yard before the cold sets in so that your turf,  plants, and flowers are ready to bloom again in the spring. 

Here are five things you can do as part of your landscaping fall clean-up routine.

1. Clean Your Pots and Containers

flower planter in front of backyard pool

This is a good time to gather all of your seasonal flower pots and clean them so they are ready for next spring. 

Remove all plant material from the pot. If the soil has become root-bound, remove this as well.  Removing the plant debris reduces the possibility of diseases being carried over to next season’s plants.

Clean your pots and bring them inside for the winter to reduce the risk of damage.

2. Cut Back Your Flower and Garden Beds

Cutting back your annuals, perennials, and shrubs will keep your beds looking tidy throughout the winter, while also setting them up for a successful bloom next year.

Annuals and Vegetables

As part of your fall cleanup, remove all of your annuals from pots and garden beds and till the soil, if applicable. If you have organic material like leaves and grass clippings, add these to the soil to help build nutrients. 

Note that it’s important to completely remove your vegetable debris (vine crops, tomato vines, etc.) from the garden as they can harbor disease and insects.

Perennials and Shrubs

Each type of perennial is different, but most should be cut back ahead of the winter frost.

  • Ornamental grass: Leave this 3”-4” tall if you choose to cut it back. Some people like to leave them for winter interest during the winter season; they provide a nice look with fresh snowfall.
  • Herbaceous perennials: Cut back about 1” above the ground.
  • Hydrangeas: Pruning techniques depend on the type of hydrangea. Some types can be cut back to the ground, leaving about 4-6.” Other types need light to moderate pruning,  to keep them in shape. There is no harm in choosing to leave these for spring pruning, as they provide winter interest.
  • Dogwoods: This is a very hardy shrub and can be pruned back 50%, removing any dead material.
  • Spireas: Cut them back to about the size of a beach ball.
  • Roses: Don’t do anything until spring. If needed, minimal pruning/shaping can be done in the fall if the rose(s) have become too large or are unsightly. Then, use a hand pruner to remove any dead canes so the roses have a neat, healthy appearance. 

3. Seed and Aeration Your Lawn

aeration plugs in someone's hand

If you want your lawn to be fuller and healthier in the spring, you should seed and aerate it in the fall.

Overseeding

You can purchase or rent an overseeder machine from a local hardware store. This machine has rotating blades that leave a groove in the ground, into which it deposits the grass seed. Confirm that the grass seed you purchase is right for the light conditions of the area (sunny vs. shady). You can then use this machine to plant the new seed in any thin spots of your lawn. 

The benefits of overseeding include:

  • Fills in bare or thin areas damaged by diseases, heat, water deficit, insects, pets, and foot and equipment traffic. It also increases the density of existing turf.
  • Reduce Risk of Pests & Disease: Overseeding will introduce new cultivars of grass seed that are more tolerant to pests and diseases.
  • Reduces weeds: Creating a lush, dense turf, is the best defense against weeds. 
  • Improves Appearance: Seed germination occurs in 7-10 days.
  • Reduce Erosion: Grasses have fibrous, dense root systems that do an exceptional job of holding soil in place.   
  •  Increases Thickness/Density: Turf becomes more durable, withstanding foot traffic and play, as well as holding up to natural weathering and environmental stress.
  • Reduces Chemicals: Maintaining a healthy, robust turf can reduce the chemical applications needed.  

Before beginning the work, check the yard for any objects that can be thrown by the blades/machine. Rocks are a common hazard.

As an alternative to renting an overseeder, you can hire a professional like Weller Brothers Landscaping to take care of this. We have all of the equipment needed and use professional, high-quality seed mixes/blends.

After planting the grass seed, do nothing. You don’t want the seed to germinate until the spring because cold winter conditions could injure or possibly kill the young tender shoots  The winter snow will help with insulation and soil moisture once spring does arrive, reducing the need to water the area as frequently.

You can put down an erosion control blanket to help protect the area until the seed germinates in the spring. This will naturally biodegrade into the ground over time. 

Lastly, when mowing your new turf for the first couple of mowings, be sure to bag or rake the clippings. Removing the clippings prevents the clipping from collecting on the turf canopy and killing or injuring the young turf.

Aeration and Fertilizer

Have you ever noticed clumps of dirt on a beautifully green lawn? That’s the process of aeration.

There are many benefits to aerating your lawn before the winter:

  • Improved air exchange between soil and atmosphere
  • Enhanced soil water uptake
  • Improved fertilizer uptake and use
  • Reduced water runoff and puddling
  • Stronger and healthier turfgrass roots
  • Reduced soil compaction
  • Enhanced heat and drought stress tolerance
  • Improved resiliency and cushioning
  • Enhanced thatch breakdown

To aerate your lawn, you can rent a machine or hire a professional.

In addition to aerations, a fall fertilizer application is very beneficial. If you chose to do both, apply the fertilizer first and then aerate your lawn. When applying a fall fertilizer, be sure to select a product that is low in nitrogen. Typical fertilizer bags will specifically say “fall” or “step four” on them.

4. Remove the Leaves

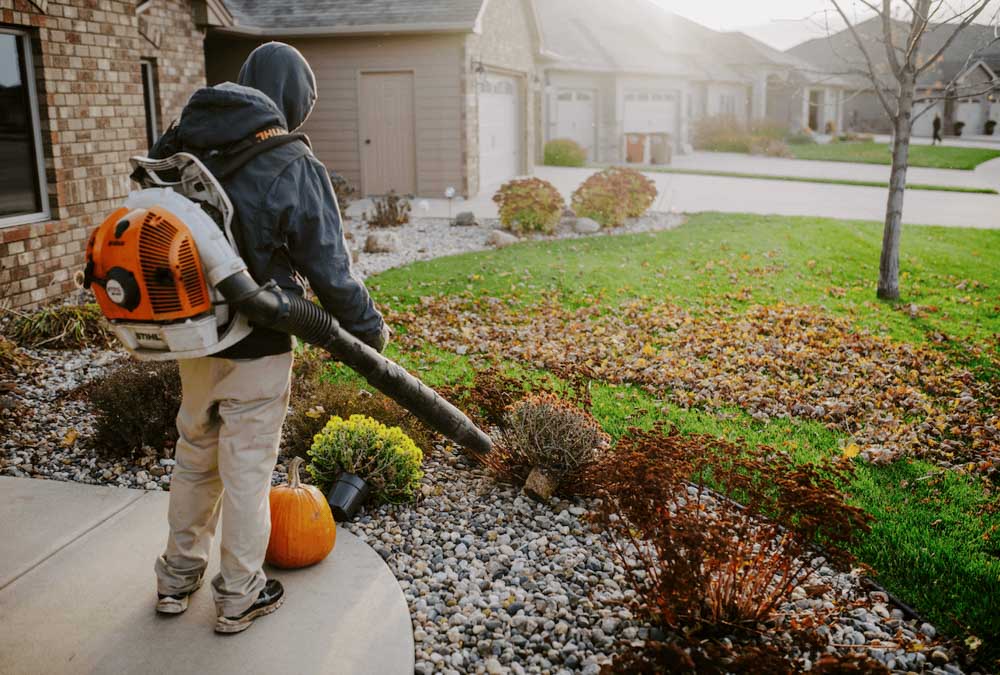
man blowing leaves from a flower bed

This is one of the most important things to do in order to keep your lawn healthy come spring. Removing the leaves prevents disease and insects from damaging your turf in early spring.

After the kids have enjoyed jumping in the leaf piles all autumn, you need to remove the fall leaves from your yard to avoid having dead spots in the grass next spring.

It’s way easier to do this in the fall than to deal with gross, matted leaves in the spring — trust us!

You can also mulch your leaves. This will require several passes with the mower in order to mulch all the leaves into tiny pieces.

5. Winterize Your Irrigation System

The last thing you should do as part of your lawn’s fall clean-up routine is to have your irrigation system winterized.

For this, hire a professional to blow out the irrigation system with an air compressor. This process removes any of the remaining water in your irrigation system so that it doesn’t freeze in the winter. If you skip this important step, it is possible that any remaining water in the irrigation system may cause damage to the irrigation system components, potentially causing a pipe to burst and creating water damage in your house.

Yikes.

Bonus tip: Don’t forget to remove the garden hose from your water spigot before the winter freeze!

Sound Like A Lot? Call the Professionals

At Weller Brothers, our team of landscape professionals does this kind of work day-in and day-out, all year long in the Midwest.

We know how to prepare your yard for each season ahead so that you can have the healthiest, most beautiful lawn on the block.

Want us to take care of prepping your yard for winter? Contact us today.

Three Types of Patios to Consider For Your Home

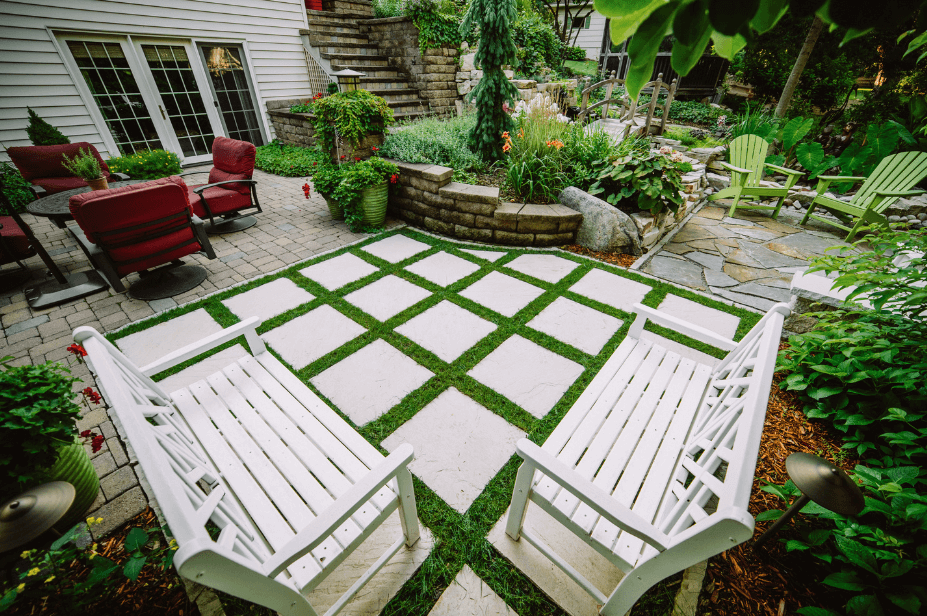
outdoor dining area with porcelain tiles
arrow_back Back to Landscape Design

Three Types of Patios to Consider For Your Home

A patio is a common addition to any Midwest backyard, providing a sturdy and attractive surface for outdoor entertaining and relaxation.

There are several types of patios to choose from, each with its own unique look and benefits. During your initial consultation with one of our landscape designers, you’ll likely discuss the intended use and desired look to determine which patio type is best for you:

  • paver
  • tile
  • concrete
  • natural stone

Let’s explore these patio options to help you decide which one is right for your outdoor space.

Paver and Tile Patios

beautiful outdoor patio work by Weller Brothers Landscaping

Homeowners in Sioux Falls, Rochester, and Des Moines often opt for paver patios because there are a variety of styles and sizes to choose from, allowing you to create nearly any look you’d like.

Pavers also offer longer patio longevity; if one cracks, you can simply have that one paver replaced.

Types of Pavers

Our landscape design team sources patio pavers from the following brands – Techo-Bloc, Belgard, or Unilock.

All three brands offer high-quality pavers but specialize in different styles. The selection comes down to the color, finish, and overall look you want for your space.

Sometimes, we even install pavers from more than one brand in the same design to add contrasting textures or colors.


Typical Cost of Pavers

The costs of your paver patio can vary greatly depending on the brand or style. Generally speaking, they can range from $25-$35/square foot.

Scroll through the images below to see examples of paver patios installed by Weller Brothers Landscaping.

Tiles

Tile patios are similar to pavers in that they offer a smooth, polished look and can be replaced individually if needed.

We can source tiles from a variety of places, but oftentimes, customers source these themselves and we provide the installation. We’ve even had some customers order porcelain tiles all the way from Italy!

That said, tiles can be a much higher financial investment, and they certainly add a wow factor to high-end landscape design.

Scroll through the images below to see examples of tile patios installed by Weller Brothers Landscaping.

Concrete Patios

A concrete patio is the most cost-effective of your patio options, and can still look fantastic in your outdoor living space.

Some homeowners prefer a smooth concrete slab surrounding their pool area or for their seating area, while others add a texture element with stamped concrete.

Take note – while a concrete patio may save you some money upfront, it could be a hassle down the road if you’re a perfectionist. One con of concrete patios is that if it cracks or settles in an area, you either have to live with it or replace the whole thing.

It’s totally up to you and your preferences!

Typical Cost of Concrete Patios

Like all patio types, the cost varies but a ballpark range is $10/square foot for plain, brushed concrete and $20-$25/square foot for stamped concrete.

The images below are examples of concrete patios installed by Weller Brothers Landscaping.

Natural Stone Patios

Natural stone – or flagstone – patios are the third patio option for your Midwest home. This type of patio offers an organic, rugged look to your space.

Again, it’s simply a matter of what your desired look is and how you plan to use the space.

For example, if you expect your patio or walkway to be a high-traffic area, natural stone may not be the best option due to the rough surface (which also makes it difficult to shovel).

That said, it can add lovely texture to an ancillary area in your space while complementing a larger, smooth paver area.

Typical Cost of Natural Stone

Natural Stone patios typically run at a similar cost to high-end pavers, or more.

For example, they can be anywhere from $25-$45 per square foot.

natural stone patio area with large custom fireplace

Questions to Ask Yourself

Now that you understand the different types of patios, you might feel overwhelmed. Let’s make the decision easier with a few simple questions:

  • How will you use the space? – If it’s a high-traffic area, flagstone, or natural stone, isn’t the best choice. Will there be kids running around the pool? If so, stamped concrete can be slippery. 
  • Are you okay with having cracks that may develop over time? If “yes,” and you’re budget-conscious, then concrete may be a good option. If you don’t want to live with cracks and settling in a few years, choose a paver patio so you can easily replace individual pavers as needed.
  • What look do you want? Do you want clean, crisp lines? Go with pavers or tiles. Do you like the organic, natural look? Then, consider natural stone.
  • What’s your budget? The cost of a patio varies, but, generally speaking, here is how patio types rank from the least investment to the highest investment:
    • Concrete
    • Stamped concrete
    • Basic pavers
    • High-end pavers
    • Natural stone/flagstone

We have a handy budget guide to help guide your landscape design decision-making. Check it out here. 

Proper Installation Is Key

No matter which type of paver patio you choose, it is important to have it properly installed by a professional, like the team at Weller Brothers. A well-installed paver patio will last for many years, providing a beautiful and functional outdoor space for you and your family to enjoy.

Our team maintains certification from the Interlocking Concrete Pavement Institute, which means that we install patio pavers according to the highest industry standards. 

Visit our design gallery to see more examples of patios we have installed in South Dakota, Iowa, and Minnesota. 

To request a custom estimate for your backyard patio project, contact us here. Our talented team of landscape designers looks forward to bringing your project to life.